Infinite synthesis
Introduction 🏢
Deep Generative AI, a field of artificial intelligence concerned with generating new data resembling its training data, is exerting an influence not only on text and image generation but also on 3d model generation within the design industry.
In the domain of architectural design, and particularly in the
phase of initial design, generative AI can serve as a useful instrument for examining a large number of design options.
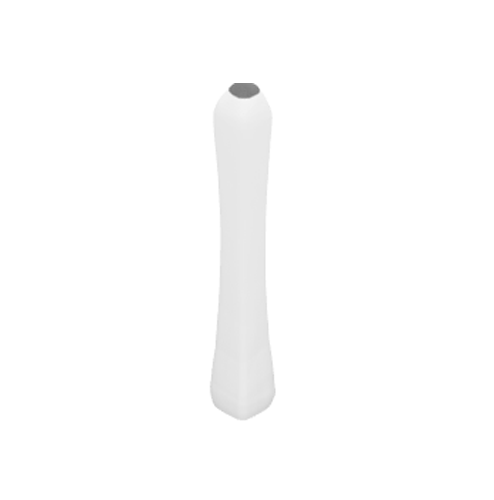
 Physical model examination by humans
Shou Sugi Ban / BYTR Architects
By leveraging the Deep Signed Distance Functions model (
DeepSDF) together with latent vectors, this project aims to
build the algorithm that can synthesize infinite number of skyscrapers similar to the trained data.
These vectors, mapped within a high-dimensional latent space, serve as the DNA for synthesizing potential skyscrapers.
Through a system that manipulates the latent vectors that express the shape of the buildings, architectural designers can rapidly generate and examine a diverse array of design options.
By manipulating two or more latent vectors through interpolation and arithmetic operations, the model provides virtually infinite design options.
This method not only introduces a new design process but also enables the exploration of novel architectural forms that were previously unattainable through conventional design methodologies.
Understanding Signed Distance Functions
In
wikipedia, Signed Distance Functions (SDFs) is defined as follows:
In mathematics and its applications, the signed distance function (or oriented distance function) is the orthogonal distance of a given point x to the boundary of a set Ω in a metric space, with the
sign determined by whether or not x is in the interior of Ω.
The function has positive values at points x inside Ω, it decreases in value as x approaches the boundary of Ω where the signed distance function is zero, and it takes negative values outside of Ω. However, the alternative convention is also sometimes taken instead (i.e., negative inside Ω and positive outside).
 SDF representation applied to the Stanford Bunny
(a) Way to decide sign: If the point is on the surface, SDF = 0
(b) 2D cross-section of the signed distance field
(c) Rendered 3D surface recovered from SDF = 0
At the core of SDFs lies their simplicity and power in
describing complex geometries.
Unlike traditional mesh representations, which rely on vertices, edges, and faces to define forms, SDFs allow a 3d mesh model with a continuous surface to be constructed, requiring only a 3D grid of
XYZs and their corresponding SDF values.
The following example concerns the CCTV headquarters by OMA, recovered from SDF = 0.
To obtain the SDF values, the entire space around the CCTV headquarters model is first sampled on a
regular grid (in this example, resolution indicates the number of grid points; that is, resolution 8 denotes an 8x8x8 grid).
At each grid point, the SDF provides a value indicating the distance of that point from the closest surface of the model.
Inside the model these values are negative (or positive, depending on the convention), and outside they are positive (or negative).
As the figure below illustrates, a greater number of grid points results in more detailed and accurate 3d models.
The numbers of grid points used in the examples are, respectively,
8x8x8(=512), 16x16x16(=4096), 32x32x32(=32768), 64x64x64(=262144), 128x128x128(=2097152).
Recovering meshes from grid points and SDF values requires the
Marching Cubes algorithm.
 Recovered CCTV headquarters from the SDFs
top 3, original 3d model · resolution 8 · resolution 16
bottom 3, resolution 32 · resolution 64 · resolution 128
Because each
sign that determines whether a point lies inside or outside the model is required,
the meshes recovered from the SDF values must be
watertight meshes that are fully closed.
Using the code below, I examined the meshes recovered from the SDF values at each grid resolution.
The
check_watertight parameter is set to True, so the code checks whether the mesh is watertight; if it is not fully closed, the mesh is converted to a watertight mesh using
pcu.
    mesh = DataCreatorHelper.load_mesh(
        path=r"deepSDF\data\raw-skyscrapers\cctv_headquarter.obj",
        normalize=True,
        map_z_to_y=True,
        check_watertight=True,
        translate_mode=DataCreatorHelper.CENTER_WITHOUT_Z
    )

    for resolution in [8, 16, 32, 64, 128]:
        coords, grid_size_axis = ReconstructorHelper.get_volume_coords(resolution=resolution)

        sdf, *_ = pcu.signed_distance_to_mesh(
            np.array(coords.cpu(), dtype=np.float32),
            mesh.vertices.astype(np.float32, order='F'),
            mesh.faces.astype(np.int32)
        )

        recovered_mesh = ReconstructorHelper.extract_mesh(
            grid_size_axis,
            torch.tensor(sdf),
        )
Data preparation and processing
The first step in preparing the data to train the DeepSDF model is to gather 3d models of skyscrapers. I used
3dwarehouse to download the free 3d models.
The models shown in the figure below were downloaded. From the left, CCTV headquarters · Mahanakhon · Hearst Tower · Bank of China · Empire State Building · Transamerica Pyramid · The Shard · Gherkin London · Taipei 101 · Shanghai World Financial Center · One World Trade Center · Lotte Tower · Kingdom Centre · China Zun · Burj Al Arab.
The 15 raw data items gathered are available at this
link.
 Skyscrapers
The next step comprises
(1) normalizing all data to fit within a regular grid volume and
(2) converting them into a consistent format.
(1) normalizing:
In general, when geometry data is used for learning, it is normalized to a value between 0 and 1 for
each individual object and centered by moving the centroid of the model to the origin (0, 0);
that is, the farthest point of the model is set to 1. This common normalization method, however, does not reflect the relative height of the skyscrapers.
Therefore, in this project the height of the
highest model among all skyscraper data is set to 1 and used as the basis for normalization.
 Normalized skyscrapers
From the left, the lowest building (Gherkin London) · the highest building (One World Trade Center)
(2) converting:
The feed-forward network of the DeepSDF model has the following architecture. It is composed of 8 fully connected layers, denoted as "FC" in the diagram.
As shown in the figure below, the dimension of the input X, excluding the latent vectors, consists of the 3 values (x, y, z).
 The feed-forward network for DeepSDF model
The data sample \( X \) is composed of \( (x, y, z) \) and the corresponding label \( s \), as follows: \( X := \{(x, s) : SDF(x) = s\} \)
Additionally, class numbers are required in order to assign a latent vector to each sample.
As noted in the introduction, the latent vectors play the role of the DNA in representing the shape of the buildings.
    class SDFdataset(Dataset, Configuration):
        def __init__(self, data_path: str = Configuration.SAVE_DATA_PATH):
            self.sdf_dataset, self.cls_nums, self.cls_dict = self._get_sdf_dataset(data_path=data_path)

        def __len__(self) -> int:
            return len(self.sdf_dataset)

        def __getitem__(self, index: int) -> Tuple[torch.Tensor]:
            xyz = self.sdf_dataset[index, :3]
            sdf = self.sdf_dataset[index, 3]
            cls = self.sdf_dataset[index, 4].long()

            return xyz.to(self.DEVICE), sdf.to(self.DEVICE), cls.to(self.DEVICE)
Implementing and training of DeepSDF model
As shown above in the
(2) converting part, the feed-forward network of the DeepSDF model is simple, as follows.
    class SDFdecoder(nn.Module, Configuration):
        def __init__(self, cls_nums: int, latent_size: int = Configuration.LATENT_SIZE):
            super().__init__()

            self.main_1 = nn.Sequential(
                nn.Linear(latent_size + 3, 512),
                nn.ReLU(True),
                nn.Linear(512, 512),
                nn.ReLU(True),
                nn.Linear(512, 512),
                nn.ReLU(True),
                nn.Linear(512, 512),
                nn.ReLU(True),
                nn.Linear(512, 512),
            )

            self.main_2 = nn.Sequential(
                nn.Linear(latent_size + 3 + 512, 512),
                nn.ReLU(True),
                nn.Linear(512, 512),
                nn.ReLU(True),
                nn.Linear(512, 512),
                nn.ReLU(True),
                nn.Linear(512, 1),
                nn.Tanh(),
            )

            self.latent_codes = nn.Parameter(torch.FloatTensor(cls_nums, latent_size))
            self.latent_codes.to(self.DEVICE)
            self.to(self.DEVICE)

        def forward(self, i, xyz, cxyz_1=None):
            if cxyz_1 is None:
                cxyz_1 = torch.cat((self.latent_codes[i], xyz), dim=1)

            x1 = self.main_1(cxyz_1)

            # skip connection
            cxyz_2 = torch.cat((x1, cxyz_1), dim=1)
            x2 = self.main_2(cxyz_2)

            return x2
The
SDFdecoder class has the following arguments as inputs:
cls_nums is the number of skyscrapers.latent_size is the dimension of the latent vector.
In this project,
cls_nums and
latent_size were set to 15 and 128, respectively.
Therefore, the size of the instance variable initialized for the latent vector (self.latent_codes) is
torch.Size([15, 128]).
The
skip connection technique used in forward propagation enables the model to learn complex functions representing the SDF by
combining low-level information (XYZ coordinates) with the high-level features learned by the network.
The learning process is described next. The model was trained for 150 epochs, and the total number of data (number of points) is 64x64x64x15 (=3932160). This was divided in an 8:2 ratio and used for the learning and evaluation processes. Training took an average of 1000 seconds per epoch.
At the end of each epoch loop, I added code to reconstruct a skyscraper in order to
qualitatively evaluate the model.
 Training process for 150 epochs
From the top, reconstructed skyscraper · losses
After training the model for 150 epochs,
I reconstructed the 3D models for the 15 skyscrapers with latent vectors by predicting the SDF value at each point of a regular grid.
In the figure below, the buildings in the left row are reconstructed by the model, and the buildings in the right row are the original 3D models.
 Comparing reconstructed skyscrapers vs. originals
The model does not appear to reconstruct the precise details of the original skyscrapers accurately,
but it does generate skyscrapers that are reasonably similar to the originals.
For this reconstruction task, I used a grid resolution of 384x384x384(=56623104).
Synthesizing skyscrapers infinitely
Finally, skyscrapers are synthesized by interpolation or by arithmetic operations.
The
following code generates an unlimited amount of data of different shapes, beginning by synthesizing latent vectors from the initial 15 buildings.
For this synthesis, I used a grid resolution of 128x128x128(=2097152).
    def infinite_synthesis(
        sdf_decoder: SDFdecoder,
        save_dir: str,
        synthesis_count: int = np.inf,
        resolution: int = 128,
        map_z_to_y: bool = True,
        check_watertight: bool = True,
    ):
        synthesizer = Synthesizer()

        synthesized_latent_codes_npz = "infinite_synthesized_latent_codes.npz"
        synthesized_latent_codes_path = os.path.join(save_dir, synthesized_latent_codes_npz)

        os.makedirs(save_dir, exist_ok=True)

        synthesized_latent_codes = {
            "data": [
                {
                    "name": i,
                    "index": i,
                    "synthesis_type": "initial",
                    "latent_code": list(latent_code.detach().cpu().numpy()),
                }
                for i, latent_code in enumerate(sdf_decoder.latent_codes)
            ]
        }

        if os.path.exists(synthesized_latent_codes_path):
            synthesized_latent_codes = {
                "data": list(np.load(synthesized_latent_codes_path, allow_pickle=True)["synthesized_data"])
            }

        while len(synthesized_latent_codes["data"]) < synthesis_count:
            print("synthesized data length:", len(synthesized_latent_codes["data"]))

            if random.Random(time.time()).random() < 0.5:
                selected_indices, synthesized_latent_code = synthesizer.random_arithmetic_operations_synthesis(
                    sdf_decoder=sdf_decoder, latent_codes_data=synthesized_latent_codes
                )

                synthesis_type = "arithmetic"

                name = f"{selected_indices}.obj"
                save_name = os.path.join(save_dir, name)

            else:
                (
                    selected_indices,
                    random_interpolation_factor,
                    synthesized_latent_code,
                ) = synthesizer.random_interpolation_synthesis(
                    sdf_decoder=sdf_decoder, latent_codes_data=synthesized_latent_codes
                )

                synthesis_type = "interpolation"

                name = f"{selected_indices}__{str(random_interpolation_factor).replace('.', '-')}.obj"
                save_name = os.path.join(save_dir, name)

            if os.path.exists(save_name):
                continue

            _ = synthesizer.synthesize(
                sdf_decoder=sdf_decoder,
                latent_code=synthesized_latent_code,
                resolution=resolution,
                save_name=save_name,
                map_z_to_y=map_z_to_y,
                check_watertight=check_watertight,
            )

            synthesized_data = {
                "name": name,
                "index": len(synthesized_latent_codes["data"]),
                "synthesis_type": synthesis_type,
                "latent_code": list(synthesized_latent_code.detach().cpu().numpy()),
            }

            synthesized_latent_codes["data"].append(synthesized_data)

            np.savez(
                synthesized_latent_codes_path,
                synthesized_data=np.array(synthesized_latent_codes["data"]),
            )

            clear_output(wait=False)
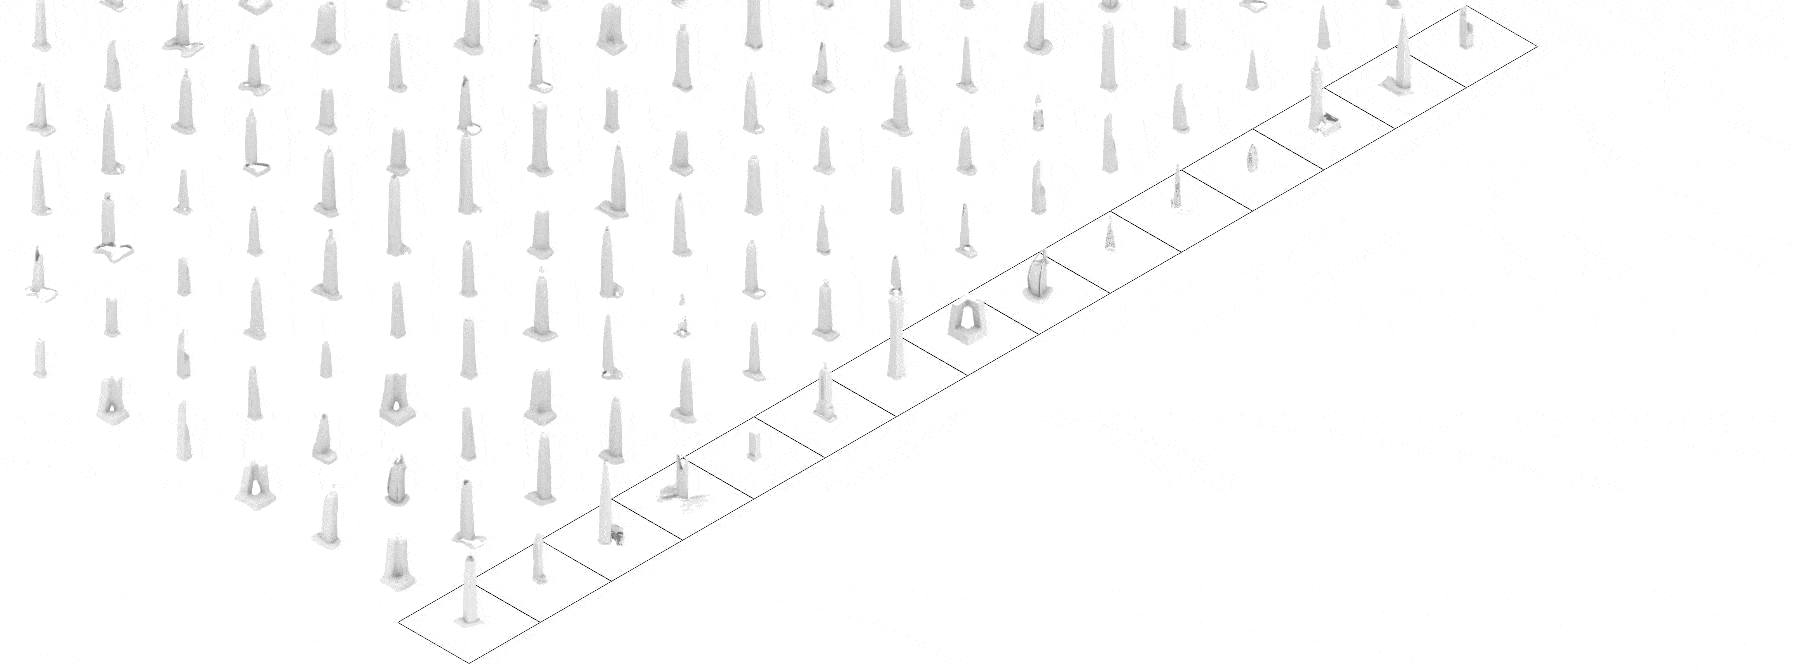 From 15 skyscrapers to 450 skyscrapers
The first row, illustrated as rectangles, shows the initial 15 skyscrapers
Tracking synthesized data
Limitations and future works
While the project demonstrates the potential of Deep Generative AI for synthesizing skyscraper designs, it is not without its limitations.
The following points therefore require improvement:
-
Design Evaluation: Although the model can synthesize skyscraper designs, it currently lacks the capability to automatically evaluate the quality of these designs.
-
Detail Expression: One of the significant limitations of the current model is its inability to capture the intricate details of the skyscraper models accurately.
-
Computational Resources: The process of training the model, especially at high resolutions for detailed synthesis, requires substantial computational power and time.
-
Interactive Design Tools: Developing interactive tools that allow architects to manipulate latent vectors directly or specify constraints and preferences could make the technology more practical and appealing for real-world design applications.
References